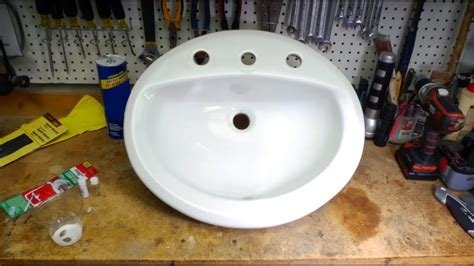
Learn the best techniques for repairing and fixing a chipped porcelain sink with our comprehensive step-by-step guide. Say goodbye to those unsightly chips!Are you tired of staring at that unsightly chip in your porcelain sink every time you step into the bathroom or kitchen? Don’t worry, we’ve got you covered. In this blog post, we will explore the best methods for repairing a chipped porcelain sink, so you can restore it to its former glory without breaking the bank. From simple DIY techniques to professional repair options, we’ll walk you through the step-by-step process of fixing that chip and making your sink look as good as new. Whether you’re a seasoned DIY enthusiast or a complete novice, you’ll find a solution that fits your skill level and budget. Say goodbye to that eyesore and hello to a beautifully restored sink with our expert tips and tricks. Let’s get started on transforming your chipped porcelain sink into a seamless and flawless fixture in your home.
How to Repair a Chipped Porcelain Sink
Are you tired of looking at that chipped porcelain sink in your bathroom or kitchen? Don’t worry, it’s a common problem, but luckily it’s also a problem that can be fixed with a little know-how and some simple tools. In this blog post, we will explore the best methods for repairing a chipped porcelain sink so that it looks good as new.
First, examine the area of the sink that is chipped and make sure it is clean and dry. Use a fine-grit sandpaper to smooth out any rough edges around the chipped area. Next, apply a small amount of porcelain repair compound to the chipped area, making sure to fill it in completely. Use a putty knife to smooth out the compound and make it level with the rest of the sink surface. Let the compound dry completely before sanding it down to match the rest of the sink. Finally, use a high-quality porcelain paint to touch up the area, making sure to carefully match the color of the rest of the sink. Once the paint has dried, your sink should look as good as new!
Repairing a Chipped Porcelain Sink
When you discover a chipped porcelain sink in your kitchen or bathroom, it can be frustrating. However, there’s no need to panic because it is possible to repair the chip and restore the sink to its former glory. The key to successfully repairing a chipped porcelain sink is to act quickly and use the right materials. With a little bit of effort and the right technique, you can make your sink look as good as new.
First, you will need to clean the chipped area thoroughly and remove any dirt or debris. Next, use a porcelain repair kit to fill in the chipped area. These kits contain a special epoxy or resin that can be colored to match the sink. Once the repair material is applied, allow it to dry and then sand it down to make it smooth and even with the rest of the sink surface. Finally, apply a top coat to seal the repair and protect it from further damage. By following these steps, you can effectively repair a chipped porcelain sink and extend its lifespan.
How to Fix a Chipped Porcelain Sink
If you have a chipped porcelain sink in your kitchen or bathroom, you may be wondering how to repair it without having to replace the entire sink. Luckily, repairing a chipped porcelain sink is a doable DIY project that can save you time and money. Here’s a step-by-step guide on how to fix a chipped porcelain sink.
First, you’ll need to clean the chipped area of the sink with a mild detergent and water to remove any dirt and debris. Then, use a fine-grit sandpaper to gently sand the chipped area and the surrounding surface. This will help the repair material adhere better to the porcelain. Once the area is clean and smooth, apply a porcelain repair compound to the chipped area using a small brush or applicator. Make sure to follow the manufacturer’s instructions for the specific repair compound you are using. Once the repair compound has dried, sand it down to smooth out any rough edges, and then apply a porcelain touch-up glaze to match the color of the sink. After the glaze has dried, your chipped porcelain sink should look as good as new!