Learn how to repair, fix, or replace sagging headliners with our step-by-step guide. Say goodbye to headliner sag for good!Are you tired of dealing with a sagging headliner in your car? It’s a common issue that many car owners face, but the good news is that it’s a problem that can be fixed without too much hassle. In this blog post, we will take you through the step-by-step process of repairing a sagging headliner. Whether you’re looking to repair the existing headliner or replace it entirely, we’ve got you covered. We’ll cover everything from identifying the cause of the sagging to the tools and materials you’ll need for the job. By the end of this post, you’ll have the knowledge and confidence to tackle this DIY project and have your headliner looking as good as new. So, let’s get started on saying goodbye to that annoying sagging headliner for good.
How to Repair Headliner Sag
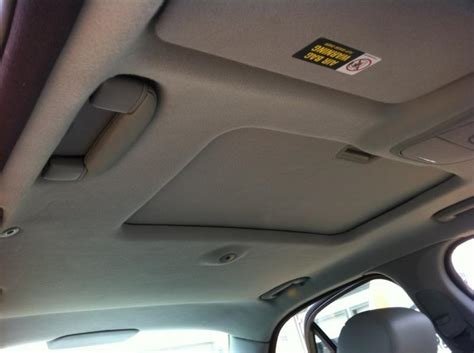
Having a sagging headliner in your car can be quite frustrating, but the good news is that you can fix it yourself without spending a lot of money. The headliner is the foam-backed fabric found on the inside roof of your car, and over time, it may start to sag and droop, making your car look old and unattractive. But with a few simple steps, you can repair the sagging headliner and give your car’s interior a fresh new look.
One way to repair sagging headliner is to use adhesive spray and pins. First, you will need to remove the headliner board from your car. Then, carefully peel back the fabric and apply adhesive spray to the foam backing. Next, firmly press the fabric back onto the foam and use pins to hold it in place while the adhesive dries. Once the adhesive has fully dried, remove the pins and reattach the headliner board to the roof of your car. This method is a quick and easy way to fix a sagging headliner and restore your car’s interior.
How to Fix Sagging Headliner
If you’re tired of the unsightly sagging headliner in your car, don’t worry – you don’t need to spend a fortune to have it fixed at a professional auto shop. With a little bit of elbow grease and some DIY know-how, you can repair the sagging headliner yourself. The first step is to remove the trim and accessories from the interior roof of your car, giving you access to the headliner material. Once you’ve done that, you can start to carefully peel back the headliner and remove the old adhesive that has failed, causing the sagging. Next, you’ll want to apply a new, high-quality adhesive to the headliner material and reattach it to the roof of your car. Make sure to smooth out any wrinkles or bubbles as you go, and once the adhesive has dried, reattach the trim and accessories for a finished look that will have your car looking as good as new!
Another method to fix sagging headliner involves using push pins or thumbtacks to temporarily hold the fabric in place. While this won’t provide a permanent fix, it can help to improve the appearance of the headliner until you’re able to fully repair it. It’s important to note that a sagging headliner can be a safety hazard, as the fabric can obstruct vision and become a distraction while driving. By taking the time to fix the sagging headliner in your car, you’re not only improving its appearance, but also ensuring a safer and more comfortable driving experience for yourself and your passengers.
How to Replace Sagging Headliner
Are you tired of seeing your car’s headliner sagging and falling down? It can be not only an eyesore, but also a safety hazard. But fear not, because you can replace the sagging headliner in just a few simple steps.
First, carefully remove any trim pieces and handles attached to the headliner. Then, gently pull the headliner down from the roof of the car. Once the old headliner is removed, clean the roof of the car to ensure a smooth surface for the new headliner to adhere to. Next, apply adhesive to the roof of the car and carefully position the new headliner in place. Finally, reattach any trim pieces and handles that were removed earlier. With these easy steps, you can have a fresh, new headliner in no time!