Learn how to repair baseboard trim yourself without replacing it. Find out the best methods for fixing baseboard trim molding in thisAre you tired of looking at your scuffed and damaged baseboard trim? Instead of calling a professional to repair or replace it, why not take matters into your own hands? In this blog post, we will guide you through the process of repairing baseboard trim yourself. Whether it’s repairing molding, fixing dents, or removing old paint, we’ve got you covered. You don’t have to be a handyman or have any special skills—the techniques we’ll share are easy enough for anyone to do. Say goodbye to unsightly baseboard trim and hello to a fresh, new look in your home. We’ll show you how to repair baseboard trim molding, how to make repairs without having to replace the entire trim, and much more. Get ready to give your baseboard trim a much-needed makeover!
How To Repair Baseboard Trim Yourself
Baseboard trim is an essential part of any home, providing a finishing touch to the bottom of walls and protecting them from damage. Over time, baseboard trim can become damaged or lose its original luster, requiring repair. Fortunately, with the right tools and techniques, it’s possible to repair baseboard trim yourself, saving time and money on hiring a professional.
Before starting the repair process, identify the damaged areas and determine the extent of the damage. Common issues with baseboard trim include cracks, dents, and chipped paint. Once you have assessed the damage, gather the necessary tools and materials, including wood filler, sandpaper, a putty knife, paint, and a paintbrush. With these items on hand, you can begin the repair process, filling in any cracks or dents with wood filler, sanding the surface smooth, and applying a fresh coat of paint to restore the trim to its original condition.
How To Repair Baseboard Trim Molding
Baseboard trim molding can add an elegant touch to any room, but over time, it can become damaged or worn. Instead of replacing the entire molding, you can save time and money by repairing it yourself. First, assess the damage. Examine the molding to determine the extent of the damage. If it’s a small crack or chip, you can simply fill it in with wood putty. If the damage is more extensive, you may need to replace a section of the molding.
Once you’ve assessed the damage, gather the necessary materials. This may include wood putty, sandpaper, a putty knife, a pencil, a saw, and a measuring tape. If you need to replace a section of the molding, make sure to purchase the same type and size of molding to ensure a seamless repair. With the right tools and materials, you can easily repair baseboard trim molding and restore it to its former beauty.
How To Repair Baseboard Trim Without Replacing
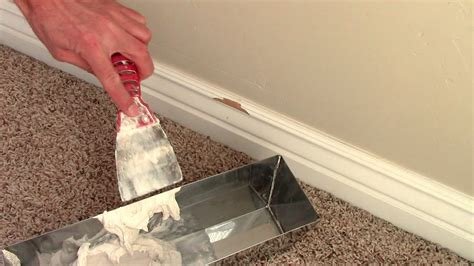
Repairing baseboard trim without replacing it can save time and money. One way to repair baseboard trim without replacing is to use wood filler to fill in any gaps or holes. Begin by cleaning the area and removing any loose paint or debris. Then, apply the wood filler with a putty knife, making sure to fill in the entire area. Once the wood filler has dried, sand the area to create a smooth surface. This method is effective for small repairs and can help restore the appearance of the baseboard trim.
Another method to repair baseboard trim without replacing is to use a wood patch. This involves cutting out the damaged section of the baseboard trim and replacing it with a new piece of wood. After measuring and cutting the wood patch to fit, secure it in place with wood glue and nails. Once the patch is in place, sand the area to blend the patch with the existing trim. This method is more labor-intensive but can be a good option for larger repairs.