Learn the best DIY methods for repairing badly cracked, large car bumpers at home. Save time and money with our expert tips!Have you ever experienced the frustration of discovering a cracked bumper on your car? It’s an all too common occurrence that can happen from a simple fender bender or even just a minor accident. But fear not, because in this blog post, we’ll be discussing everything you need to know about repairing a cracked bumper. From small cracks to larger, more serious damage, we’ll cover it all. Whether you’re looking to take on the repair job yourself or seeking professional help, we’ve got you covered. So if you’re ready to say goodbye to that unsightly crack on your bumper and restore your car to its former glory, keep reading for our comprehensive guide on how to repair a cracked bumper.
How To Repair Badly Cracked Bumper
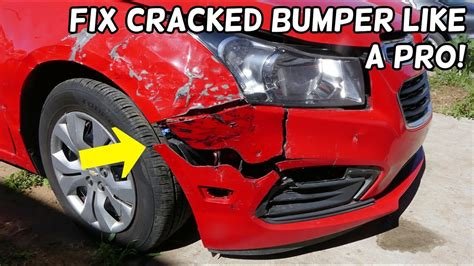
Having a badly cracked bumper can be a headache for any car owner. It not only affects the appearance of your car, but it can also lead to further damage if left unrepaired. Fortunately, with the right tools and materials, you can easily repair a badly cracked bumper yourself.
One of the first steps in repairing a badly cracked bumper is to assess the extent of the damage. This will help you determine whether the bumper can be repaired or if it needs to be replaced. Once you have determined that it can be repaired, you will need to gather the necessary materials, such as a bumper repair kit, sandpaper, and primer. Before starting the repair process, it is important to clean the damaged area and remove any loose pieces of plastic to ensure a smooth surface for the repair.
How To Repair Cracked Bumper Yourself
Are you tired of seeing that unsightly crack on your car bumper every time you walk up to your car? Well, the good news is that you can repair it yourself without having to spend a fortune at the auto body shop. With a little bit of elbow grease and the right materials, you can have your bumper looking good as new in no time.
First, you’ll need to gather the necessary materials, including sandpaper, a heat gun, bumper repair epoxy, and a plastic filler. Once you have everything you need, begin by sanding down the area around the crack to remove any rough edges and create a smooth surface for the epoxy to adhere to. Next, use the heat gun to soften the plastic and carefully reshape the bumper back into its original form. Then, apply the bumper repair epoxy to the crack and use the plastic filler to fill in any remaining gaps. Once the epoxy has dried, sand down the area once again to ensure a smooth finish. Finally, give the bumper a fresh coat of paint to blend it in with the rest of the car, and voila – your bumper will look good as new!
How To Repair Large Cracked Bumper
When it comes to repairing a large cracked bumper, it’s important to assess the extent of the damage before starting the repair process. Begin by thoroughly cleaning the area around the crack to remove any dirt or debris. This will ensure that the repair materials adhere properly to the bumper surface. Next, use sandpaper to smooth the edges of the crack and create a rough surface for the repair material to bond to.
Once the surface is properly prepared, apply a strong adhesive or epoxy to the cracked area, making sure to fill in the entire length of the crack. Allow the adhesive to dry completely before sanding down the excess material to create a smooth, even surface. Finally, use a matching paint color to touch up the repaired area and blend it seamlessly with the rest of the bumper. With these steps, you can effectively repair a large cracked bumper on your own, saving time and money compared to a professional repair.