Learn how to easily repair your Moen kitchen faucet handle, cartridge, and aerator with our step-by-step guide. Say goodbye to leaks and drips!If you have a Moen kitchen faucet that’s been giving you trouble, you’re not alone. Many homeowners struggle with various issues related to their Moen kitchen faucets, from a loose handle to a dripping faucet. The good news is that many of these problems can be resolved without the need for a professional plumber. In this blog post, we’ll guide you through the process of repairing a Moen kitchen faucet, covering the most common issues that can arise.
We’ll start by addressing how to repair a Moen kitchen faucet handle, a common point of frustration for many users. Then, we’ll move on to the Moen kitchen faucet cartridge, which can also cause difficulties if not functioning properly. Finally, we’ll delve into the topic of repairing a Moen kitchen faucet aerator, another potential source of annoyance for homeowners. By the end of this post, you’ll have the knowledge and confidence to tackle these issues and get your Moen kitchen faucet working perfectly once again.
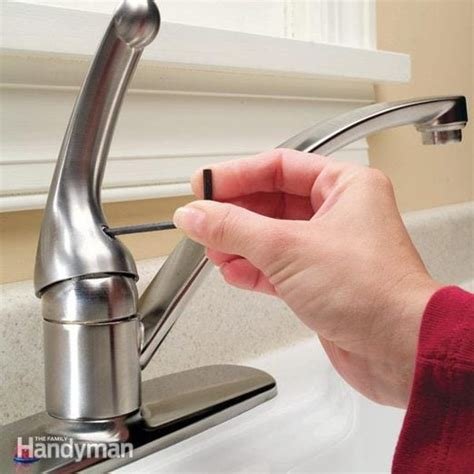
How To Repair A Moen Kitchen Faucet Handle
When it comes to repairing a Moen kitchen faucet handle, the most common issue is a loose or wobbly handle. This can be caused by wear and tear over time, or it may simply need to be tightened. To fix this, start by turning off the water supply to the faucet. Then, use a screwdriver to remove the screw that holds the handle in place. Once the screw is removed, you can access the handle mechanism and tighten any loose parts. Be sure to check for any worn or damaged components that may need to be replaced.
If the handle is still not functioning properly after tightening, you may need to replace the entire handle. To do this, you’ll need to purchase a replacement handle that is compatible with your Moen faucet model. Remove the old handle by following the same steps as before, and then install the new handle in its place. Make sure to secure it properly with the screw, and then turn the water supply back on to test the handle’s functionality. With these steps, you can easily repair a Moen kitchen faucet handle and restore its smooth operation.
How To Repair A Moen Kitchen Faucet Cartridge
When your Moen kitchen faucet starts to leak or have low water pressure, it may be time to repair the cartridge. The cartridge is a crucial component of the faucet that controls the flow of water. If it becomes worn or damaged, it can cause a variety of problems. Fortunately, repairing a Moen kitchen faucet cartridge is a relatively simple process that you can do yourself with just a few basic tools.
To begin the repair process, you will need to gather a few tools. These include an adjustable wrench, pliers, and a Moen cartridge puller. Once you have the necessary tools, start by shutting off the water supply to the faucet. This can usually be done by turning off the valves under the sink. Next, use the adjustable wrench to remove the handle of the faucet, exposing the cartridge underneath. Use the pliers to gently remove the retaining clip that holds the cartridge in place. Once the clip is removed, use the Moen cartridge puller to extract the cartridge from the faucet body.
How To Repair A Moen Kitchen Faucet Aerator
Are you experiencing low water pressure in your kitchen faucet? One common cause of this issue is a clogged aerator. The aerator is a small attachment located at the end of the faucet spout that controls the flow of water and helps to reduce splashing. Over time, mineral deposits and debris can build up in the aerator, causing it to become clogged and restrict water flow.
If you’re facing this problem, don’t worry – repairing a Moen kitchen faucet aerator is a simple and straightforward process. The first step is to remove the aerator from the faucet spout. Use a pair of pliers to grip the aerator and gently twist it counterclockwise to unscrew it from the spout. Once the aerator is removed, inspect it for any visible debris or mineral buildup. You can use a small brush or toothbrush to scrub away any deposits. If the buildup is particularly stubborn, you can soak the aerator in a solution of vinegar and water to help dissolve the deposits.