Learn how to make your repository public, private repo public, and publish a repository with our simple step-by-step guide. Maximize your visibility and impact today!Are you looking to share your code with the world? Making your repository public is a great way to showcase your work and collaborate with others. In this blog post, we will walk you through the step-by-step process of making your private repository public. Whether you’re new to version control or just need a refresher, we’ve got you covered. From understanding the importance of making your repository public to the practical steps of how to do it, this guide will help you navigate the world of publishing a repository. So, if you’re ready to take the next step in your coding journey and share your work with the community, keep reading to learn how to make your repository public.
How To Make Repository Public
Are you looking to make your repository public on GitHub? Making a repository public is a great way to share your code with others and collaborate on open source projects. In this blog post, we will walk through the steps to make your repository public on GitHub.
First, log in to your GitHub account and navigate to the repository you want to make public. Once you are on the repository page, click on the Settings tab. In the Danger Zone section, you will see an option to make the repository public. Click on the Make public button and confirm your choice. Your repository is now public and accessible to anyone on the internet. Keep in mind that once you make a repository public, anyone can view, fork, and contribute to your code, so make sure you are comfortable with sharing your code with the world.
How To Make Private Repo Public
When you have a private repository in a version control system like GitHub or Bitbucket, there may come a time when you need to make it public. Perhaps you want to share your code with the community, or you’re collaborating with others who need access to the repository. Whatever the reason, making a private repo public is a straightforward process.
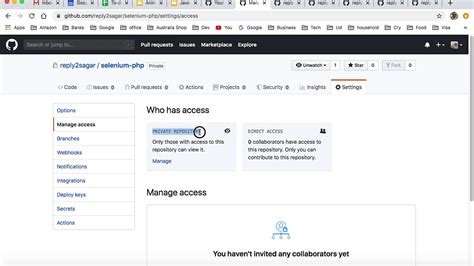
First, log in to your account on the platform where your private repository is hosted. Navigate to the settings or options for the repository, and look for a section related to repository visibility. Here, you should find an option to change the repository from private to public. Simply select this option, confirm any prompts or warnings, and your repository will now be accessible to anyone with the repository’s URL. Keep in mind that making a repository public will make all of its code and history visible to the public, so be sure that this is what you intend to do before proceeding.
How To Publish A Repository
Are you looking to share your coding project with the world? Making your repository public is a great way to showcase your work and collaborate with others. Fortunately, it’s easy to do with platforms like GitHub. Here’s a step-by-step guide on how to publish a repository and make it accessible to everyone.
First, log in to your GitHub account and navigate to the repository you want to publish. Then, click on the Settings tab and scroll down to the Danger Zone section. Here, you’ll find the option to make your repository public. Once you confirm this action, your code will be visible to anyone on the internet. Keep in mind that making a repository public means that anyone can see and fork your code, so be sure to review your project’s security and privacy settings before sharing it with the world.