Learn how to repair a floor jack handle, seal, and pump with our expert tips and step-by-step guide. Keep your floor jack in top condition!If you have a floor jack that’s not functioning properly, don’t rush to buy a new one just yet. With a little know-how and some basic tools, you may be able to repair it yourself. In this blog post, we’ll cover the three most common issues with floor jacks and how to repair them. From fixing a broken handle to repairing a leaky seal and troubleshooting a malfunctioning pump, we’ve got you covered.
Whether you’re a DIY enthusiast or just looking to save some money on expensive repairs, learning how to fix your floor jack can be a valuable skill. By following our step-by-step guide, you can get your floor jack back in working order in no time. So, roll up your sleeves and get ready to tackle those repairs – your trusty floor jack will be lifting cars and tackling projects again in no time!
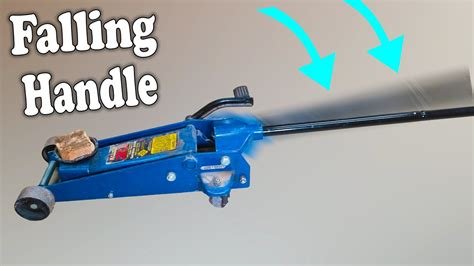
How To Repair A Floor Jack Handle
When your floor jack handle is not working properly, it can hinder your ability to lift heavy vehicles or equipment. In order to repair a floor jack handle, the first step is to inspect the handle for any damage or wear and tear. If there are any visible cracks or signs of wear, it’s important to replace the handle with a new one. To do this, simply remove the old handle by unscrewing it from the floor jack and attaching the new handle in its place. Be sure to tighten the handle securely to prevent any future issues.
Another common problem with floor jack handles is a sticking or malfunctioning release valve. If this is the case, you’ll need to disassemble the handle and clean any dirt or debris that may be causing the valve to stick. Once the valve is clean, reassemble the handle and test it to ensure it is functioning properly. In some cases, the release valve may need to be replaced altogether, so it’s important to check the condition of the valve before reassembling the handle.
How To Repair A Floor Jack Seal
When it comes to maintaining your car, taking care of the floor jack is often overlooked. However, it is important to ensure that all parts of the floor jack are in good working condition to guarantee safety and efficiency. One of the crucial components of a floor jack is the seal. Over time, the seal may wear out and lead to leaks, decreasing the jack’s performance. Here’s how to repair a floor jack seal and extend the life of your equipment.
First, you will need to gather the necessary tools and replacement parts. This includes a floor jack seal repair kit, a screwdriver, pliers, and safety gloves. Once you have the tools ready, you can start the repair process by lifting the floor jack to its maximum height, securing it in place, and releasing the pressure by turning the release valve counterclockwise. Next, using the screwdriver and pliers, carefully disassemble the piston and remove the old seal. Make sure to clean the piston and seal housing thoroughly before installing the new seal from the repair kit. Once the new seal is in place, reassemble the piston and test the floor jack to ensure that the seal is functioning properly and there are no leaks.
How To Repair A Floor Jack Pump
When it comes to repairing a floor jack pump, it’s important to first identify the issue. This could be a leak, a malfunctioning pump handle, or a lack of fluid. Once you have determined the problem, you can then proceed with the necessary repairs.
One common issue with floor jack pumps is a leak. To repair this, you will need to locate the source of the leak and then replace the damaged seal. Make sure to use high-quality replacement seals to ensure a proper fix. If the pump handle is the problem, you may need to disassemble the pump and either repair or replace the handle. Finally, if the pump is simply low on fluid, adding more hydraulic fluid should solve the issue.