Learn step-by-step how to replace, change, and fix a lamp socket with our easy-to-follow guide. Say goodbye to flickering lights!5 Easy Steps for Repairing a Lamp Socket
Are you tired of dealing with a flickering or non-functional lamp in your home? It may be time to repair the lamp socket. Fortunately, the process is not as daunting as it may seem, and with a few simple tools and a little know-how, you can have your lamp shining brightly once again in no time.
In this blog post, we will walk you through the process of repairing a lamp socket, covering everything from replacing the socket to fixing any wiring issues that may be causing the problem. Whether you are a seasoned DIY-er or a beginner looking to save a few bucks on repairs, you will find this guide helpful and easy to follow. So, let’s dive in and learn how to replace, change, and fix a lamp socket in just 5 easy steps.
How to Replace a Lamp Socket
Replacing a lamp socket can be a simple and cost-effective way to restore a non-functioning lamp back to working condition. Before you begin, always remember to unplug the lamp from the power source to ensure your safety. The first step in the process is to carefully remove the lampshade and light bulb, setting them aside in a safe place. Next, assess the damage to the lamp socket to determine if it can be easily repaired or if a replacement is necessary.
If a replacement is needed, start by purchasing a new lamp socket that matches the specifications of the old one. Once you have the new socket, begin by removing the old one. This typically involves unscrewing the socket from the lamp base and carefully detaching the wires. Take note of the way the wires are connected to the old socket so that you can easily connect them to the new one. After removing the old socket, attach the wires to the new socket following the same configuration. Finally, screw the new socket into place and reassemble the lamp with the bulb and shade. Once completed, plug the lamp back in and test the new socket to ensure it is working properly. With these simple steps, you can replace a lamp socket and bring new life to your favorite lighting fixture.
How to Change a Lamp Socket
When it comes to changing a lamp socket, the process can seem daunting at first. However, with the right tools and a little guidance, it can be a straightforward and easy task. The first step in changing a lamp socket is to make sure the lamp is unplugged and cool to the touch. This will prevent any potential electrical shocks or burns while working on the socket.
Next, you’ll need to remove the lampshade and light bulb from the lamp. Then, carefully unscrew the socket from the lamp base, taking care not to damage any wires. Once the old socket is removed, you can then replace it with a new one by attaching the wires to the corresponding terminals and screwing the new socket into place. Finally, reattach the lampshade and light bulb, plug the lamp back in, and test to make sure the new socket is working properly.
How to Fix a Lamp Socket
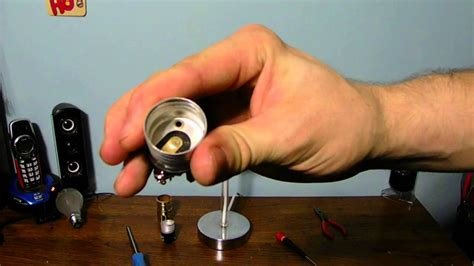
When it comes to repairing a lamp socket, it can be a relatively simple process as long as you have the right tools and know-how. The first step is to make sure the lamp is unplugged to avoid any accidents. Next, carefully remove the bulb and shade to access the socket. Once you have access to the socket, use a screwdriver to remove the socket from the lamp base.
After the socket is removed, inspect the wiring for any damage or wear. If the wiring looks frayed or damaged, it will need to be replaced. Otherwise, you can proceed by loosening the screws on the socket and removing the wires. Take note of which wires are connected to which screws, as this will be important when attaching the new socket. Finally, install the new socket by attaching the wires to the corresponding screws and securing the socket to the lamp base. Once everything is in place, reassemble the lamp and test to ensure the socket is functioning properly.