Learn expert tips on repairing, replacing, and rebuilding a brake master cylinder. Save time and money with our step-by-step guide.If you’re experiencing issues with your vehicle’s braking system, the culprit could be a faulty master cylinder. The master cylinder is a critical component that helps to transmit the pressure from your brake pedal to the brakes themselves. When it malfunctions, it can lead to decreased braking performance and safety hazards on the road. In this blog post, we will discuss the step-by-step process of repairing a master cylinder, including how to identify common issues, how to replace the master cylinder if necessary, and how to rebuild it to restore optimal functionality. Whether you’re a seasoned DIY mechanic or new to vehicle repairs, this guide will provide you with the knowledge and confidence to tackle this essential task and ensure your vehicle’s braking system is in top condition. Let’s dive in and learn how to take control of your master cylinder repairs.
How To Repair A Brake Master Cylinder
When your car’s brake master cylinder starts to malfunction, it’s essential to address the issue quickly to ensure the safety of your vehicle. One of the most common problems with a brake master cylinder is a leak. If you notice brake fluid leaking from the master cylinder, it’s important to repair it as soon as possible to prevent further damage to your braking system.
One way to repair a leaky brake master cylinder is to replace the seals inside the cylinder. To do this, you’ll need to remove the master cylinder from the vehicle and disassemble it to access the seals. Once you have the master cylinder disassembled, carefully remove the old seals and replace them with new ones. Make sure to clean the inside of the cylinder thoroughly before reassembling it to ensure that there is no debris or dirt that could cause the new seals to fail. Finally, reinstall the master cylinder in your vehicle and test the brakes to ensure that the repair was successful.
How To Replace A Master Cylinder
Replacing a master cylinder is a crucial task that requires precision and attention to detail. Before beginning the replacement process, it is important to thoroughly inspect the existing master cylinder to determine the root cause of the issue. Once the problem has been identified, the first step is to disconnect the brake lines and remove the old master cylinder from the vehicle. Carefully clean the area surrounding the mounting location to ensure a smooth and secure fit for the new master cylinder. When installing the new master cylinder, it is essential to carefully follow the manufacturer’s instructions to ensure proper alignment and function. Finally, it is vital to bleed the brake system to remove any air and ensure optimal performance.
How To Rebuild A Master Cylinder
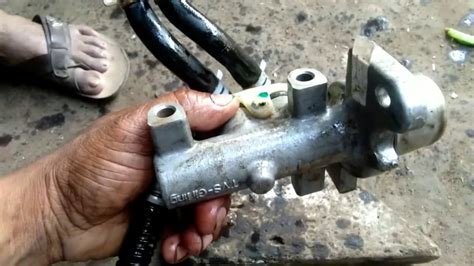
When it comes to a brake master cylinder, it is important to know how to rebuild it in case of any issues. The first step in rebuilding a master cylinder is to gather all the necessary tools and equipment, including a rebuild kit, brake fluid, and a brake bleeder kit. Once you have all the necessary supplies, you can start by removing the master cylinder from the vehicle and disassembling it carefully.
Next, you will need to inspect all the components for any signs of wear or damage, such as worn out seals or rusted parts. If any parts are found to be damaged, they should be replaced with new ones from the rebuild kit. After replacing any damaged components, you can then reassemble the master cylinder and reinstall it back into the vehicle. Finally, you will need to bleed the brake system to remove any air and ensure that the brakes are functioning properly. Following these steps will help you successfully rebuild a master cylinder and ensure the safety of your vehicle.