Learn how to fix a chip in your windshield with our step-by-step guide. Discover easy methods for repairing small windshield chips. Prevent costly replacements.Are you frustrated with a small chip in your windshield? Don’t worry, because we’ve got you covered. In this blog post, we will walk you through the step-by-step process of repairing a chip in your windshield. Whether it’s a small chip or a larger one, we have the solutions to help you fix the problem and avoid further damage. From assessing the size of the chip to gathering the necessary materials, we’ll guide you through the entire repair process. By the end of this post, you’ll have the knowledge and confidence to tackle this repair on your own, saving you time and money. So, let’s dive in and learn how to repair that chip in your windshield, so you can get back on the road with a clear and safe view.
How to Fix a Chip in Windshield
Are you frustrated with the unsightly chip in your windshield? Don’t worry, repairing a small chip in your windshield is easier than you think. By following these simple steps, you can fix the chip and prevent it from spreading, saving you time and money in the long run.
First, gather all the necessary materials for the repair, including a windshield repair kit, rubbing alcohol, and a clean cloth. Start by cleaning the area around the chip with the rubbing alcohol and cloth to ensure a clean and dry surface for the repair. Then, carefully follow the instructions provided with the repair kit to fill the chip with the resin and apply the curing strips. Once the resin has cured, use a razor blade to carefully scrape off any excess resin and polish the area with glass cleaner and a soft cloth.
How to Repair a Small Chip in Windshield
Driving with a small chip in your windshield can be quite unnerving, as it can quickly turn into a larger crack if left unattended. However, repairing a small chip in your windshield is actually a simple and cost-effective process that can be done at home. First, assess the size and depth of the chip to determine if it can be repaired or if the windshield needs to be replaced. Next, clean the area around the chip with a mild detergent and water, and dry it thoroughly with a clean cloth.
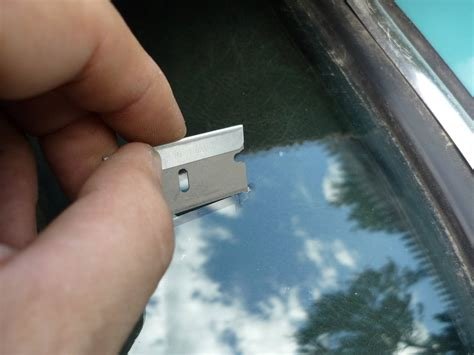
After the area is clean and dry, apply a small amount of clear resin to the chip. Then, cover the area with a curing film and allow it to dry in direct sunlight. Once the resin is dry, remove the film and use a razor blade to scrape away any excess resin. Finally, polish the area with glass cleaner and a soft cloth to make the repair virtually invisible. By following these simple steps, you can easily repair a small chip in your windshield and prevent it from turning into a larger crack.
How to Repair a Windshield Chip
Are you frustrated with the small chip in your windshield? Don’t worry, you can easily fix it without spending a fortune on professional help. The first step is to clean the area around the chip with a mild detergent and water. This will ensure that any dirt or debris is removed, allowing for a better seal when you make the repair. Once the area is clean and dry, apply a small amount of pit filler to the chip, smoothing it out with a razor blade or other flat tool. Make sure to follow the instructions on the pit filler product for the best results.
Next, you will need to allow the pit filler to cure according to the product’s instructions. Once it is fully dry, use a glass repair kit to apply a small amount of resin to the chip, covering it with a piece of curing film. Use a curing lamp to expose the resin to UV light, allowing it to harden and seal the chip. After the resin has cured, remove the film and polish the area with a glass polishing compound to restore the clarity of your windshield. With these simple steps, you can easily repair a windshield chip and prevent it from spreading or becoming a larger problem.