Learn how to effectively clean, replace, and fix keyboard keys with our easy-to-follow guide. Say goodbye to sticky and malfunctioning keys!Are you struggling with a keyboard that has sticky, unresponsive, or missing keys? A malfunctioning keyboard can be frustrating and disruptive to your work or entertainment. The good news is that you don’t necessarily have to replace the entire keyboard. In this blog post, we will discuss various ways to repair computer keyboard keys so that you can get back to typing smoothly and efficiently.
We will cover three main methods for fixing keyboard keys: cleaning, replacing, and troubleshooting. First, we will explore how to clean keyboard keys to remove dirt, dust, and grime that may be causing them to stick or stop working. Next, we will delve into the process of replacing individual keyboard keys that are beyond repair. Finally, we will address troubleshooting steps for fixing keyboard keys that are not responding as they should. By the end of this post, you will have the knowledge and tools to tackle any keyboard key repair issue with confidence and ease.
How to clean keyboard keys
Computer keyboard keys can get dirty over time, and cleaning them is an essential part of maintaining your keyboard. To begin cleaning your keyboard, start by turning off your computer and unplugging the keyboard. Use a can of compressed air to remove any debris and dust that may be trapped in between the keys. Next, use a small brush or a cotton swab dipped in a mixture of water and isopropyl alcohol to gently clean the surface of each key. Be careful not to use too much liquid as it can seep underneath the keys and cause damage. Finally, wipe down the entire keyboard with a microfiber cloth to remove any remaining residue.
Regular cleaning of your keyboard keys will not only keep them looking new, but also help prevent the buildup of dirt and grime that can cause keys to stick or stop working. By following these simple steps, you can ensure that your keyboard keys remain in top condition, allowing for smooth and efficient typing for years to come.
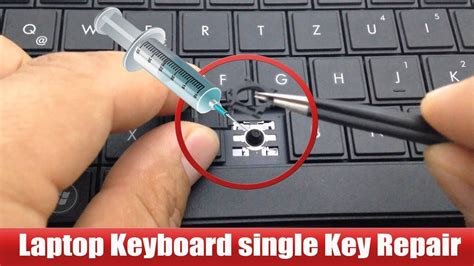
How to replace keyboard keys
Replacing the keyboard keys on your computer can seem daunting at first, but with the right tools and a little patience, you can easily replace any key that is not working properly. The first step is to determine which keys need to be replaced. Check for any keys that are sticking, not responding, or are completely missing. Once you have identified the keys that need to be replaced, you can start the process of removing the old keys and installing the new ones.
Begin by using a keycap puller or a small flathead screwdriver to carefully remove the old keycaps from the keyboard. Be gentle to avoid damaging the surrounding keys or the keyboard itself. Once the old keycaps are removed, you can simply snap the new keycaps into place. Test the keys to make sure they are functioning properly, and your keyboard will be as good as new!
How to fix keyboard keys not working
Having computer keyboard keys that are not working can be frustrating and can greatly hinder your productivity. Fortunately, there are several methods you can try to fix this issue on your own before needing to seek professional help. One potential solution is to try cleaning the keys to remove any debris or dirt that may be causing them to malfunction.
If cleaning the keys does not solve the problem, another method you can try is to replace the malfunctioning keys with new ones. This may require purchasing replacement keys or contacting the manufacturer for assistance. Additionally, you can also try troubleshooting the issue through the computer’s settings and drivers to see if there are any software-related issues causing the keys to not work properly.