Learn how to fix, replace, and install roof flashing with expert tips and guidance. Keep your roof in top condition with these helpful techniques.Roof flashing is an essential component of your home’s roofing system, as it helps to prevent water from seeping into the areas where the roof meets a chimney, vent, or wall. However, over time, flashing can become damaged or worn out, leading to potential leaks and water damage inside your home. Fortunately, repairing, replacing, or installing roof flashing is a task that can be tackled by most homeowners with the right tools and know-how. In this blog post, we will provide you with step-by-step instructions on how to fix, replace, and install roof flashing, so you can protect your home from water damage and ensure the longevity of your roof. Whether you’re dealing with minor repairs or a complete replacement, we’ve got you covered with expert tips and guidance. So, let’s dive in and learn how to take care of your roof flashing to keep your home safe and dry.
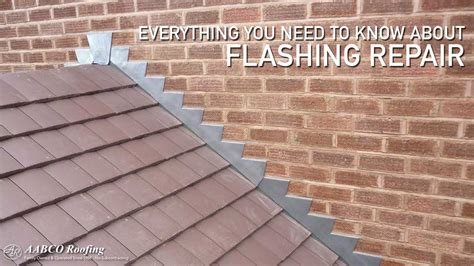
How To Fix Roof Flashing
Roof flashing is crucial for preventing leaks and maintaining the integrity of your roof. Over time, flashing can become damaged or worn out, leading to potential water damage. If you notice any issues with your roof flashing, it’s important to address them as soon as possible to prevent further damage to your home. Here are the steps to fix roof flashing:
Assess the Damage: Start by inspecting the flashing around your roof. Look for any signs of damage such as cracks, rust, or gaps. It’s important to identify the extent of the damage before beginning any repairs.
Seal the Gaps: If you notice any gaps or cracks in the flashing, use a roofing sealant to fill them in. Make sure to choose a sealant that is compatible with the material of your flashing. Apply the sealant evenly and allow it to dry completely before moving on to the next step.
Replace Damaged Flashing: In some cases, the flashing may be too damaged to repair with sealant alone. If this is the case, you will need to replace the flashing entirely. Carefully remove the damaged flashing and install a new piece in its place. Be sure to secure the new flashing tightly to prevent any future issues.
By following these steps, you can effectively fix your roof flashing and prevent any potential leaks or water damage to your home.
How To Replace Roof Flashing
Roof flashing is an important component of any roofing system, as it helps prevent water from seeping into the roof and causing damage. Over time, flashing can become damaged or worn out, leading to potential leaks and other issues. In this blog post, we will discuss the steps to replace roof flashing and ensure that your roof remains watertight and secure for years to come.
The first step in replacing roof flashing is to identify the areas that are in need of repair. This may involve inspecting the roof for any signs of damage, such as rust, cracks, or missing flashing. Once the damaged areas have been identified, the next step is to carefully remove the old flashing using a pry bar or similar tool. It’s important to take care during this process to avoid causing further damage to the roof or surrounding materials.
How To Install Roof Flashing
Installing roof flashing is an important step in protecting your home from water damage. Whether you are replacing old flashing or installing it for the first time, it’s essential to follow the proper steps to ensure a watertight seal. First, you’ll need to gather the necessary materials, including the flashing itself, roofing cement, and nails. Next, carefully remove any old flashing, taking care not to damage the surrounding roof materials. Once the area is clean and dry, you can begin installing the new flashing.
Start by applying a layer of roofing cement to the area where the flashing will be installed. Then, carefully position the flashing and secure it in place with nails. Be sure to overlap the flashing pieces to provide extra protection against water infiltration. Once the flashing is in place, apply another layer of roofing cement over the top to create a watertight seal. Finally, double-check your work to ensure that all edges are properly sealed and that there are no gaps or gaps. By following these steps, you can effectively install new roof flashing and protect your home from potential water damage.