Learn the best techniques for fixing, patching, and mending rubber boots to keep them in top condition for longer.Rubber boots are a wardrobe staple for many outdoor enthusiasts, providing protection from the elements and keeping our feet dry and comfortable. However, even the most durable rubber boots can experience wear and tear over time, leading to cracks, holes, and leaks. The good news is that with the right tools and techniques, you can easily repair and extend the life of your favorite pair of rubber boots. In this blog post, we will explore the step-by-step process of fixing, patching, and mending rubber boots, so you can keep them in top condition for years to come. Whether you’re an avid hiker, gardener, or just someone who loves spending time outdoors, learning how to repair your rubber boots will save you money and ensure that you can continue enjoying your outdoor activities, no matter the weather. So, let’s get started!
How to fix rubber boots
When it comes to repairing rubber boots, there are a few simple steps you can take to fix any leaks or tears. First, identify the damaged area of the boot. This could be a small tear, a hole, or a leak around the seams. Once you’ve located the problem, make sure the area is clean and dry before starting the repair process. If the damage is a small tear, you can use a rubber adhesive to seal the area. Apply the adhesive to both sides of the tear, press them together, and let it dry according to the product instructions. If the damage is more severe, you can use a patch kit specifically designed for rubber boots. These kits usually include patches and adhesive that can be applied to the damaged area to provide a long-lasting repair. Make sure to follow the instructions on the patch kit carefully to ensure a successful repair.
After the repair is complete, allow the boots to dry thoroughly before wearing them again. If the damage was a leak around the seams, you can also use a waterproof sealant to reinforce the seams and prevent future leaks. With these simple steps, you can easily fix your rubber boots and extend their lifespan, saving you time and money in the long run.
How to patch rubber boots
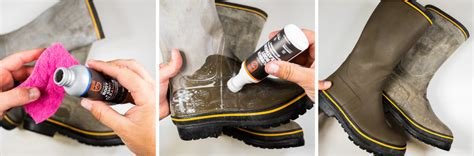
When it comes to keeping your rubber boots in good condition, knowing how to patch them up is essential. Whether you’ve got a small hole or a larger tear, it’s important to take care of it before it gets worse. The first step in patching your rubber boots is to thoroughly clean the area around the damage. Use a mild soap and water to gently remove any dirt or debris. Once the area is clean, you can assess the damage and determine the best method for patching it up.
One of the most effective ways to patch rubber boots is by using a waterproof adhesive patch. Cut the patch to fit the size of the damage, and then carefully follow the instructions for applying it to the boot. Make sure to press firmly and allow the adhesive to fully bond with the rubber. Once the patch is in place, give it plenty of time to dry and cure before wearing the boots again. This method provides a strong and reliable fix for your rubber boots, ensuring they stay in good shape for longer.
How to mend rubber boots
When it comes to making your favorite pair of rubber boots last longer, learning how to mend them is essential. Whether it’s a small hole or a larger tear, being able to repair rubber boots can save you money and extend the life of your footwear. One easy way to mend rubber boots is by using a rubber patch kit. These kits often come with everything you need to quickly and effectively repair any damage to your boots.
To start, clean the area around the hole or tear on your rubber boots with a damp cloth. Once the area is clean and dry, apply the rubber patch according to the instructions on the kit. Press down firmly to ensure it adheres to the boot. Give it ample time to dry before wearing the boots again. This simple mending method can help you avoid having to replace your favorite pair of rubber boots and keep them in top condition for years to come.