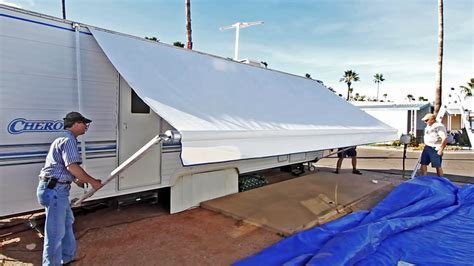
Learn expert tips on how to fix, replace, and clean your RV awning. Keep your RV looking great with these easy maintenance techniques.Are you a proud owner of an RV? Then you know the importance of a functional and well-maintained awning. Whether you’re looking to fix, replace, or simply clean your RV awning, this blog post is here to guide you through the process. A damaged or dirty awning can be a real headache, but with the right knowledge and tools, it’s a problem that can be easily solved. In this post, we will cover everything from basic repairs to full replacements, as well as the best tips for keeping your RV awning looking brand new. So, if you’re ready to take on the task of repairing your RV awning and getting back to enjoying your outdoor adventures in style, keep reading for all the information you need.
How To Fix Rv Awning
When it comes to fixing your RV awning, there are a few key steps to keep in mind. The first step is to thoroughly inspect the awning for any tears, holes, or damage. Make sure to check the fabric, the arms, and the roll bar for any signs of wear and tear. Once you have identified the issues, you can proceed with the necessary repairs.
Next, gather the tools and materials needed for the job. This may include a patch kit, adhesive, and a ladder. Depending on the extent of the damage, you may also need to purchase replacement parts. It’s important to follow the manufacturer’s instructions and safety guidelines when making repairs to your RV awning. Always use caution when working at heights and handling tools.
How To Replace Rv Awning
Replacing an RV awning can seem like a daunting task, but with the right tools and knowledge, it can be a straightforward process. The first step is to carefully remove the old awning fabric by unscrewing the brackets and gently pulling the fabric out of the roller tube. Once the old fabric is removed, it’s important to inspect the roller tube and awning arms for any damage. If any parts are damaged, they will need to be replaced before installing the new awning fabric.
Next, measure the length and width of the roller tube to ensure you purchase the correct size of the awning fabric. Once you have the new awning fabric, carefully slide it into the roller tube and secure it in place. Then, reattach the awning arms and brackets, making sure everything is tightened securely. Lastly, extend and retract the awning a few times to make sure it’s functioning properly. With these steps, replacing an RV awning can be a manageable DIY project for any RV owner.
How To Clean Rv Awning
One of the most important tasks for RV maintenance is cleaning the awning. Over time, dirt, mold, and mildew can build up on the awning fabric, making it look old and unsightly. To start the cleaning process, mix a solution of water and mild soap in a bucket. Use a soft-bristled brush to gently scrub the awning fabric, focusing on areas with noticeable stains or dirt buildup. Be sure to rinse the awning thoroughly with clean water to remove all soap residue.
After cleaning the fabric, it’s important to let the awning completely air dry before rolling it back up. Allowing the fabric to dry completely will prevent mold and mildew from forming. In addition to regular cleaning, it’s also a good idea to apply a protective awning spray to help repel water and resist future dirt and stains. By following these tips, you can keep your RV awning looking clean and new for years to come.
