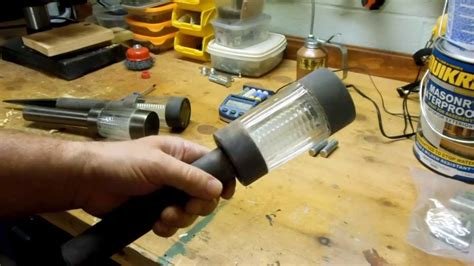
Learn how to fix, replace batteries, and clean solar lights with expert tips. Keep your outdoor space bright and energy-efficient.Are your solar lights not working as they should? Don’t worry, you’re not alone. Solar lights are a great addition to any outdoor space, but like any other electronic device, they can sometimes run into issues. In this blog post, we will cover some common problems with solar lights and provide you with step-by-step instructions on how to fix them.
From replacing batteries to cleaning the panels, we will walk you through the process of troubleshooting and repairing your solar lights. By the end of this post, you will have the knowledge and confidence to tackle any issues that may arise with your solar lights, allowing you to keep your outdoor areas beautifully illuminated. So, if you’re ready to revitalize your solar lights and bring them back to life, keep reading to learn how to repair them effectively.
How To Fix Solar Lights
Solar lights are a great addition to any outdoor space, providing ambient lighting without the hassle of wiring or electricity. However, over time, these lights can experience wear and tear, causing them to malfunction. If you’re facing issues with your solar lights, there are several steps you can take to repair them and get them working like new again.
One of the most common problems with solar lights is that they simply stop working. This could be due to a variety of issues, such as a faulty battery or a damaged solar panel. To fix this, start by cleaning the solar panel with a soft cloth and some soapy water. Next, check the battery and replace it if necessary. In some cases, the issue may be with the LED bulbs themselves, in which case they will need to be replaced. By following these steps, you can get your solar lights back up and running in no time.
How To Replace Batteries In Solar Lights
When your outdoor solar lights start to dim or stop working altogether, it may be time to replace the batteries. The first step is to identify the type of batteries your solar lights use. Most solar lights use rechargeable AA batteries, but it’s important to check the specific requirements for your particular model.
Once you have the replacement batteries, you’ll need to locate the battery compartment in your solar lights. This is usually located underneath the solar panel. Use a screwdriver to open the compartment and carefully remove the old batteries, taking note of their orientation. Then, insert the new batteries in the correct position and close the compartment securely. After replacing the batteries, allow the solar lights to receive a full day of sunlight to ensure they are fully charged and ready to illuminate your outdoor space once again.
How To Clean Solar Lights
Keeping your solar lights clean is essential to ensure they function properly and provide bright illumination for your outdoor space. Over time, dust, dirt, and other debris can accumulate on the solar panels, reducing their efficiency and ability to charge the batteries. To clean your solar lights, start by removing any debris or build-up from the surface of the panels using a soft cloth or sponge. Avoid using harsh chemicals or abrasive materials, as these can cause damage to the panels. Next, check for any obstructions or blockages near the light sensor or LED bulbs, and gently clean these areas as well. Finally, consider applying a thin layer of protective wax or sealant to the panels to help repel dirt and maintain their performance.
Regular maintenance and cleaning can help extend the lifespan of your solar lights and ensure they continue to brighten up your outdoor space for years to come. By following these simple cleaning tips, you can keep your solar lights in top condition and enjoy their benefits throughout the year.
